
Vehicle Apps - Free Download & Official Reviews

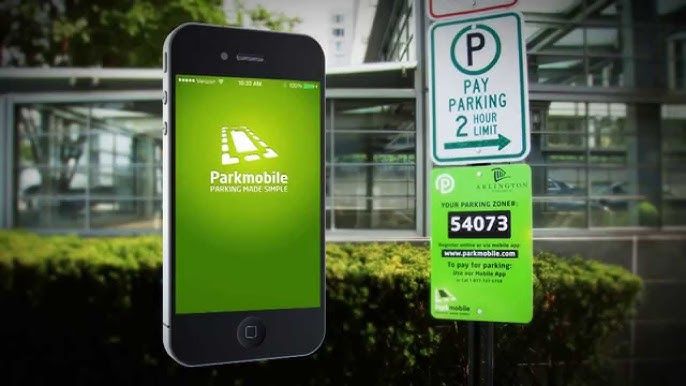
Easy Installation of ParkMobile
 4.5
4.5
For Android Devices:1. Swipe up the screen of your device to open the Google Play Store app.2. Search for “ParkMobile.” More simply, just visit the result page from here https://play.google.com/store/apps/details?id=net.sharewire.parkmobilev2&hl=en.3. To download the application, click on the button labelled “Install”.4. After the app appears, to start its usage, launch the app and create an account with the application.For iOS Devices:1. Open the Apple App Store.2. Search for “ParkMobile.” Or, simply view the corresponding page from here https://apps.apple.com/us/app/parkmobile-park-pay-go/id365399299.3. To get the app, click on the “Get” button.4. After installation of this app, you simply have to enter it and finish the registration process.For PC Users:ParkMobile can be used directly through any browser on the internet using ParkMobile at parkmobile.io. A first-time user of this service does not require any downloading of software, one has to register online.Fascinating Features of ParkMobileParkMobile offers several innovative features that enhance the parking experience:1. Find Parking Easily: The application enables the user to find open parking lot around their location through GPS navigation.2. Pay via Smartphone: Pay for parking through a smartphone without having to use coins or cash at all.3. Session Management: The app is capable of sending notifications for your parking session, and an option to renew the time set.4. Parking Reservations: People are able to book the parking spaces in advance hence guarantee that there will be parking space when they get there.

Easy Reservation and Management of Parking
4.5
How to Reserve Parking Spots:1. Open ParkMobile or website.2. Enter the location or parking zone number.3. Select your desired time and date.4. Confirm and proceed to pay.5. Confirmation will be provided through email or notification.How to Pay for Parking:1. Start parking session by clicking the button provided in the app.2. Enter zone number or scan the QR code of parking.3. Choose a payment method and confirm.4. Get instant confirmation and check your active session.How to Extend Parking Time:1. Navigate to your active parking session in the app.2. Tap “Extend Time” and add more time.3. Confirm and pay for the extension.4. Receive notification of your updated session.

ParkMobile Pro Benefits Explained
4.5
Subscribing to MembershipTo enroll in ParkMobile Pro:1. Launch the App or Website: Launch ParkMobile on your device, or open parkmobile.io.2. Tap to Open Settings Menu: Enter your account settings by tapping on your profile icon.3. Upgrade Option: Select “Upgrade to Pro”.4. Payment Process: Te follow the prompts for payment, usually around $0.99 per month, and your Pro membership will be activated.Unique FeaturesBy signing up with ParkMobile Pro, a host of premium features are unlocked for its users:1. Parking Availability Notifications: Get notifications on available spots near your location in real time, based on your preference.2. Quicker Checkouts: Experience faster checkouts during peak hours while booking parking spots.3. Priority Customer Support: Have priority access to special support channels for inquiries and issues about your reservations or how to manage your account.Using Pro FeaturesTo use these features:1. When looking for a place to park, have location services on to notify you when one is near.2. Checkout fast, which can save those valuable minutes when you have to run.

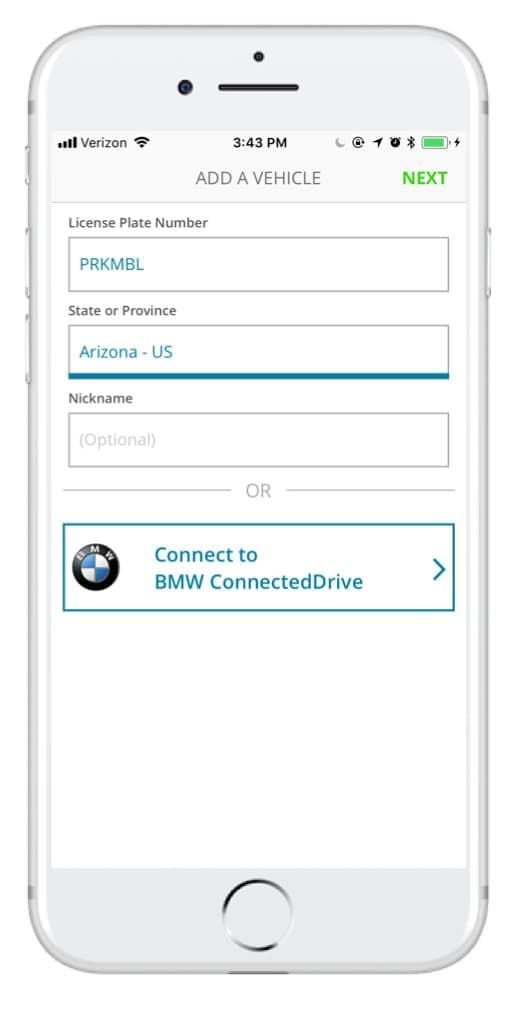
Add Vehicles to Your Account
4.5
How to Add Vehicles1. Access via App or Website: Access ParkMobile from your smartphone or visit parkmobile.io from your computer.2. Settings Menu: Tap your profile icon to open settings in-app or tap “Account Settings” if you use the website.3. Vehicles Section: Tap on “Vehicles”-you see listed any entries, along with an option to add new.4. Add New Vehicle:- Tap “Add New” or click the “+” button next to existing vehicles.- Fill in any of the required information: license plate number, state of registration, and nickname.5. Save Changes: After entering all of the information, tap “Save” or “Add Vehicle.” Do this for multiple vehicles per account, up to five per account.6. Default Vehicle - Optional: You might want to select a default vehicle. That way, each time you go to make a reservation, the system will default to this vehicle unless changed by you.

Update ParkMobile
4.5
For Android Users:1. Open Google Play Store: Launch the Play Store app on your Android device.2. Open My Apps & Games: Tap the menu button-three horizontal lines in the upper left corner-open “My apps & games.”3. Locate ParkMobile: Scroll down to the bottom to list all installed applications and search for ParkMobile there.4. If available, it will say “Update” next to it; click that to begin downloading a newer version.iOS Users:1. App Store, Apple: Open the App Store from your iPhone or iPad.2. Your Profile Icon: Tap the profile icon at the right top of the screen.3. Look Down for Updates: Now locate your pending list for updates; if ParkMobile is in there, tap “update” on it.For PC Users:Since ParkMobile is web-based and accessed through browsers on PCs, all updates are done automatically on the server side. In case any issue arises while using parkmobile.io, just refresh your browser.

Stay Current of Google Translate Updates
4.3
Updating on Android Devices:1. Open the Google Play Store.2. Tap your profile picture at the top-right corner.3. Select “Manage apps & devices.”4. In the “Updates available” area, find Google Translate.5. Tap “Update.”Updating on iOS Devices:1. Launch the App Store on your iPhone/iPad.2. Tap your profile icon at the top corner.3. Scroll down to find Google Translate under “Updates Available.”4. Tap “Update” to update to the latest version.Updating Web Version1. The web interface (translate.google.com) gets automatically updated on Google servers.2. Clear cache in the browser to have the latest version.3. Refresh the webpage after clearing cache to get the latest version loaded.4. Look out for new features or new changes in the interface that indicate updates.

Have The Weather Channel on Your Fingertips
4.3
Installing on iPhone (iOS)1. Launch the App Store on your iPhone or iPad2. Tap the Search icon on the bottom of the screen3. Type “The Weather Channel” in the search bar4. Locate the official app with The Weather Channel logo. More simply, visit the downloading page from https://apps.apple.com/us/app/weather-the-weather-channel/id2956464615. Tap “Get” or cloud and arrow download icon6. Authenticate using Face ID, Touch ID, or Apple ID password7. Allow download and installation to complete8. After installed, tap “Open” to launch the app9. Allow location permission when prompted for local forecasts to be precise10. Sign up or log in as a guest to start using the appInstalling on Android Devices1. Open the Google Play Store on your Android device2. Tap the Search bar at the top3. Enter “The Weather Channel” and tap search4. Select the official app from the list. In a more straightforward way, get access to the same destination page from here https://play.google.com/store/apps/details?id=com.weather.Weather&hl=en&gl=us5. Tap “Install”6. Allow the download and installation to complete7. Once installed, tap “Open”8. Grant location permissions when prompted9. Complete the initial setup by adhering to the on-screen instructions10. Register for personalized forecasts or enter as a guestNavigation on PCsBecause there is no desktop version of The Weather Channel on PCs, the users may open its official website at https://weather.com/ using a browser to access real-time and accurate weather forecast information.

Activate PayPal Account
4.6
Steps to Create a PayPal Account:1. Visit PayPal Website or Download the App: Open your browser and go to [www.paypal.com] or if you are using any phone or tablet, search for it in the marketplace of your device .2. Click on ‘Sign Up’: To register a new account, go to homepage, the button you need to tap will be “Sign Up.”3. Choose Account Type: Choose between a Personal Account where you can shop and send money as well as a Business Account where you can receive payment and manage business ventures.4. Personal Information: Input your e-mail address, choose a proper password, and type more information including your name and address.5. Agree to Terms: Tick the box that mentions that you have read the terms and conditions of PayPal, and after that press “Agree and Create Account.”6. Add Payment Methods: You can tie your credit/debit card or even bank account in order to facilitate easy and fast transactions.7. Verify Your Email Address: An email with the welcome note and verification link will be sent to your inbox, open the link to verify your account.8. Complete Identity Verification: Provide any additional information required, including uploading ID proof if necessary.